
The Microsoft bought the GitHub for US$ 7,5 Billions, and the internet got wild, you can continue using the GitHub, according to Microsoft, it will keep github as it is.

There are several alternatives as GitLab and the BitBucket, also there are options that are free source/open source that you can install there in your server. The GitLab has a Community version, it is written in Ruby and has a lot of resources, because it has many resources it demands at least a computer with the minimum of 4 GB of memory Ram, to old modests servers we have available the Gogs written in Golang, it is simple but it meets all our basic needs to whom uses the GitHub and it can be installed there in your old computer with 512 MB of memory Ram.

In this tutorial, we go to see how to install the Gogs on ubuntu, from the source code of Gogs, you can also install the Gogs copying the binaries, but if you like to learn the things from the base as me, open your bash there and let’s go
1- Install the database MariaDB (mysql)
To use the Gogs with MariaDB (mysql), it is recomended to use at least the version 10.2 of the MariaDB, in this moment(14/06/2018) while I write this tutorial, the version that there is in the ubuntu official repository is previous to this version, therefore, I am going to install from the MariaDB official repository.
(case your ubuntu is not the 18.04 nor the 16.04, you need to check in the mariadb site the repository of your distro)
#update the repositories data
sudo apt-get update
#install the software that helps to add new repositories
sudo apt-get install software-properties-common

#adding the key of mariadb repository
sudo apt-key adv --recv-keys --keyserver hkp://keyserver.ubuntu.com:80 0xF1656F24C74CD1D8

#[18.04] add the repository, repository below for ubuntu 18.04
sudo add-apt-repository 'deb [arch=amd64] https://ftp.utexas.edu/mariadb/repo/10.3/ubuntu bionic main'
or
#[16.04] add the repository, repository below for ubuntu 16.04
sudo add-apt-repository 'deb [arch=amd64,i386,ppc64el] https://ftp.utexas.edu/mariadb/repo/10.3/ubuntu xenial main'

#update again the repositories data
sudo apt-get update
#install the mariadb
sudo apt-get install mariadb-server
#in the install process, it will ask the password
#that you want to the mariadb root user

#after the install process, configure the mariadb,
#as explained below
sudo mysql_secure_installation
After execute the command mysql_secure_installation, it will ask the password of the root user that was set in the mariadb instalation , after you inform the password it will ask if you want to change the password, say No(N). In the next steps say Yes(Y) to all questions.
Create a user called git in the mariadb, the user will have privileges in the database of the Gogs.
#access the database, inform the root password
mysql -u root -p
--create the git user
--change the password below, to a password of your choice
CREATE USER 'git'@'localhost' IDENTIFIED BY 'password';
--create the database, it is important the character set is in utf8mb4
CREATE DATABASE gogs_production CHARACTER SET utf8mb4 COLLATE utf8mb4_unicode_ci;
--grant the permission to the git user be able to use the database
GRANT ALL PRIVILEGES ON gogs_production.* TO 'git'@'localhost';
--save the permission
FLUSH PRIVILEGES;
--logout the mariadb
exit;
2- Install the Nginx and the Git
sudo apt-get install -y nginx git
For a while we are not going to configure nginx, let’s go to the next steps. We will configure it after that.
3- Install the Gogs
We are going to create a user in the system called git, we are going to put in its home directory, the executable of the language golang ( we are not going to use the version of the ubuntu repository beacause this version is older than the version of ther official site, we are going to use the version of the official site). We are going also to put in the home directory of the user git the files of the gogs, and the directory of the repository files, if we need to change something, we will know that all is concetrated in the home directory of the user git.
Create the user git in the System
#in the bash, create a user git
sudo adduser --disabled-login --gecos 'Gogs' git
Install the language golang
#log with the user created
sudo su - git

#create a directory  to install the golang, and access the directory
mkdir local
cd local

#dowload go
#to know the most recent version,access https://golang.org/dl/
#at this moment while I write this tutorial the current stable
#version is 1.10.3
wget https://dl.google.com/go/go1.10.3.linux-amd64.tar.gz
#extraia o arquivo baixado
tar zxvf go1.10.3.linux-amd64.tar.gz

#Setting the environment

cd ~
echo 'export GOROOT=$HOME/local/go' >> $HOME/.bashrc
echo 'export GOPATH=$HOME/go' >> $HOME/.bashrc
echo 'export PATH=$PATH:$GOROOT/bin:$GOPATH/bin' >> $HOME/.bashrc
source $HOME/.bashrc
Install the gogs
#still logged with the git user
#download and install the dependencies
go get -u github.com/gogs/gogs

# compile the main program
cd $GOPATH/src/github.com/gogs/gogs
go build

#still inside the directory $GOPATH/src/github.com/gogs/gogs/
#create the directory below to customise the settings of the gogs
mkdir -p custom/conf
#copy the settings file
cp conf/app.ini custom/conf/
Setting the gogs
#open the settings file created in the previous step
nano custom/conf/app.ini
!! In the section [service] you can restrict the extern access, and the creation of new users, changing the key DISABLE_REGISTRATION for true, only the administrator user will be able to create new users, and changing the key REQUIRE_SIGNIN_VIEW for true, only logged users will have access to the repositories !!
Change the follow lines, in the sections below:
RUN_USER=git
...
[repository] ;section - directory of the repositories
ROOT=/home/git/gogs-repositories

[database] ;section -- change the password, for the password that you created for the git user of the mariadb database
DB_TYPE = mysql
HOST = 127.0.0.1:3306
NAME = gogs_production
USER = git
PASSWD = pass

[service] ;section -- change the two keys below, for true
; Does not allow register and admin create account only
DISABLE_REGISTRATION = true
; User must sign in to view anything.
REQUIRE_SIGNIN_VIEW = true
Save the file with the keyss CTRL+x, and press Y to confirm.
Now we go to setting the Gogs to initialize along with the system through init.d
#get back to the home of git user
cd ~
#copy the script which already comes prepared for the ubuntu(debian)
cp $GOPATH/src/github.com/gogs/gogs/scripts/init/debian/gogs ./gogs.init
#edit the file
nano gogs.init
-change these two lines in the begin of the file, from:
# Required-Start: $syslog $network
# Required-Stop: $syslog
to:
# Required-Start: $syslog $network mysql nginx
# Required-Stop: $syslog $local_fs
Below in the same file, type the path where is the directory of gogs for the init.d be able to find the installation directory of it, changing the line WORKING_DIR for:
WORKINGDIR=/home/git/go/src/github.com/gogs/gogs
Save the file with the keys CTRL+x, and press Y to confirm.
The next steps will be made with your user, make logout from git user and follow the next steps
#making logout from git user
exit
#move the file which we edited in the previous step to the init scripts directory.
sudo mv /home/git/gogs.init /etc/init.d/gogs
#grant permission of execution to it
sudo chmod ug+x /etc/init.d/gogs
#and finally enable it to it initialize along with the system
sudo update-rc.d gogs defaults 30 70
Now we go to configure the Nginx, to use gogs service through nginx:
!! If you already used the nginx for another process/service, you can use another port different from 80, but if you didn’t use it, you can keep the port 80 in the setting file like we are going to do in this step !!
#delete the standard site of nginx
#only delete if you don't use the nginx to another service
#if you use to another service, jump to the next command
sudo rm /etc/nginx/sites-enables/default

#create the file of the gogs service in the nginx
sudo nano /etc/nginx/sites-available/gogs
Paste the content below in the file:
server {
    listen 80; #port 80
    server_name git.example.com;

    location / {
        proxy_pass https://localhost:3000; #url of the gogs
    }
}
Save the file with the keys CTRL+x, and press Y to confirm
#create a symlink from the setting file created,
#to the directory of enabled sites of the nginx
sudo ln -s /etc/nginx/sites-available/gogs /etc/nginx/sites-enabled/gogs
Start the services
#start the service of the gogs
sudo service gogs start
#restart the service of the nginx, that way it will recognize
#the new settings
sudo service nginx restart
Using the browser, open the address https://localhost, or https://localhost:num_port if you have used a different port of 80
If this is the first time you access the gogs, it will be presented a screen like this. In this screen you will inform the settings and create the main user.
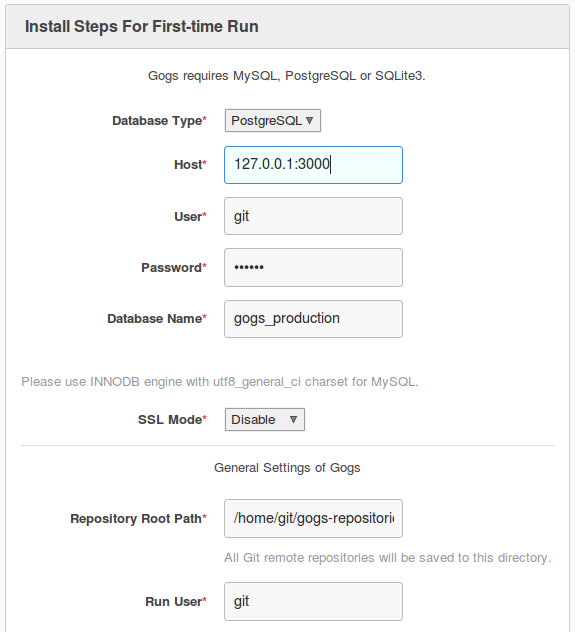
Review if the data is correct, Database Type* must be as MySql, in the area “Admin Account Settings” type the name, email and the pass of the admin user. After this just click on “Install Gogs”. If you made all the steps correctly the system will configure the database, and then it will show the initial screen of the system, with the admin user already logged in.
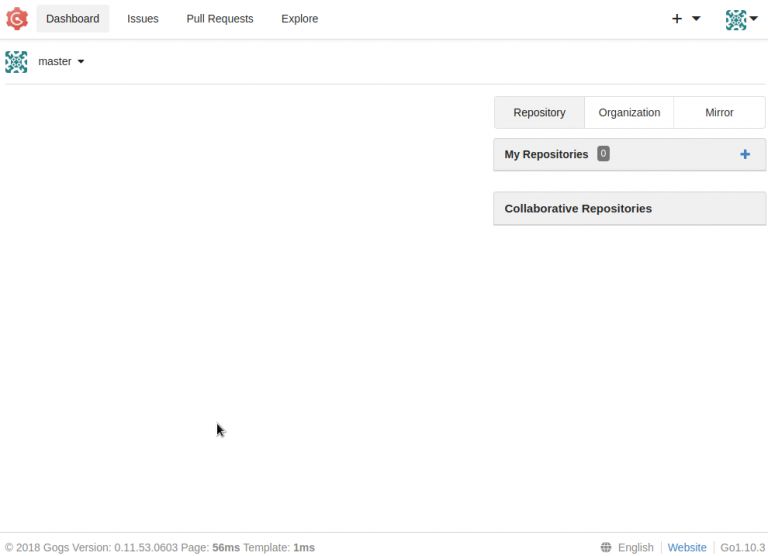
Enjoy your new git/gogs server.